
Suwanee Kitchen Remodel: A Floor-to-Ceiling Navy Cabinet Wall With Glass Uppers
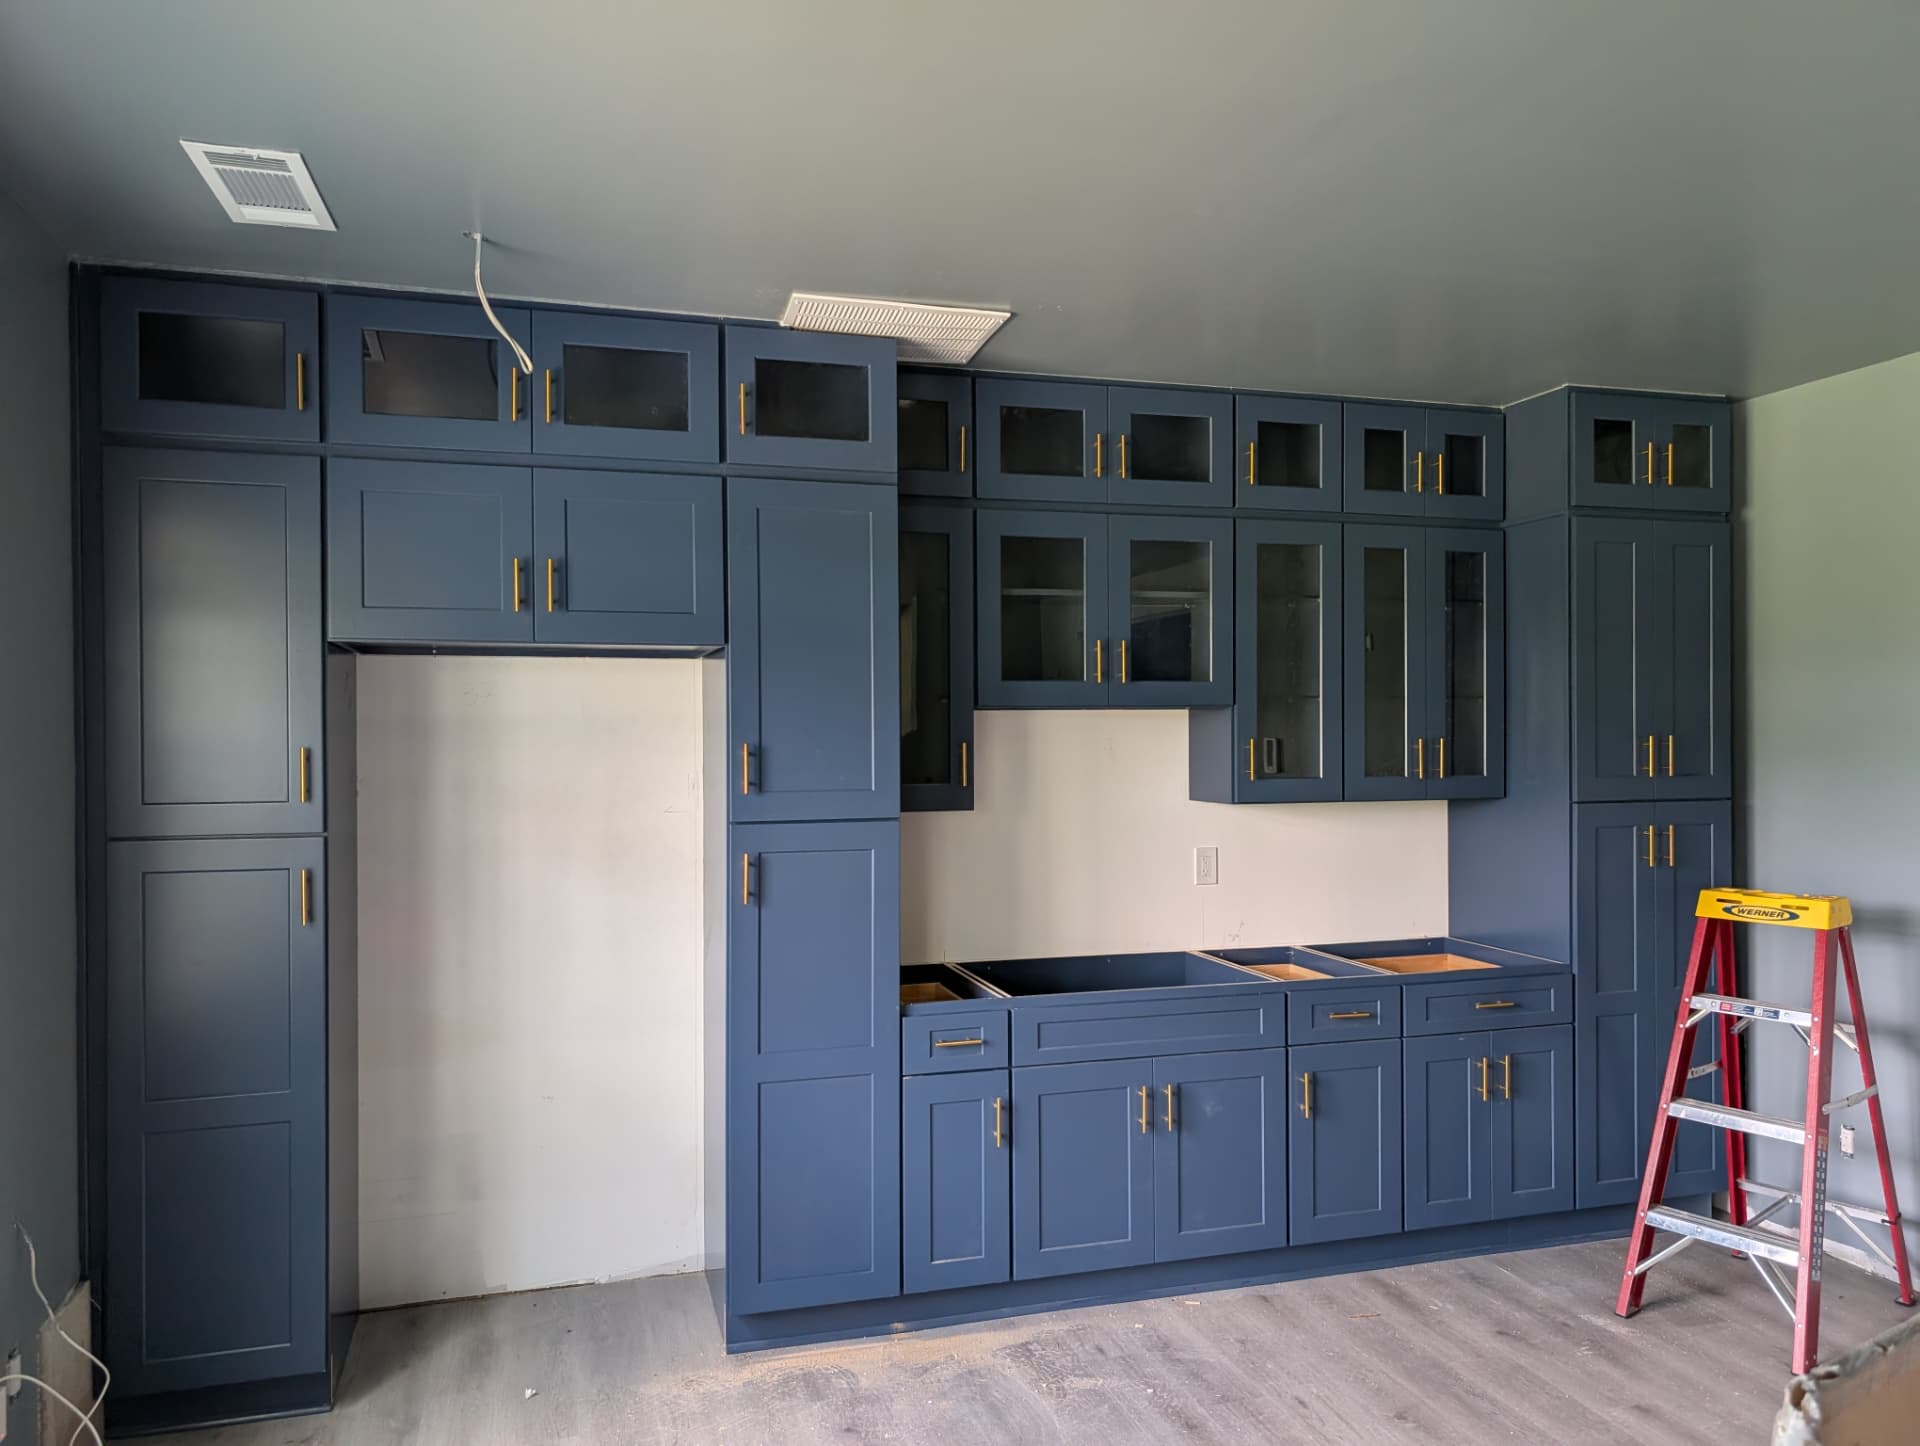
A single navy blue cabinet wall in a Suwanee kitchen, floor to ceiling: stacked glass-front uppers, pantry towers at both ends, brushed gold hardware, white quartz and a brass apron sink.
This Suwanee kitchen was built around one idea: a single navy blue cabinet wall, floor to ceiling, wall to wall, with stacked glass-front uppers and no wasted inches. It is the kind of wall that either looks custom or looks like a row of boxes, and the difference is entirely in the layout and the install.
The design brief
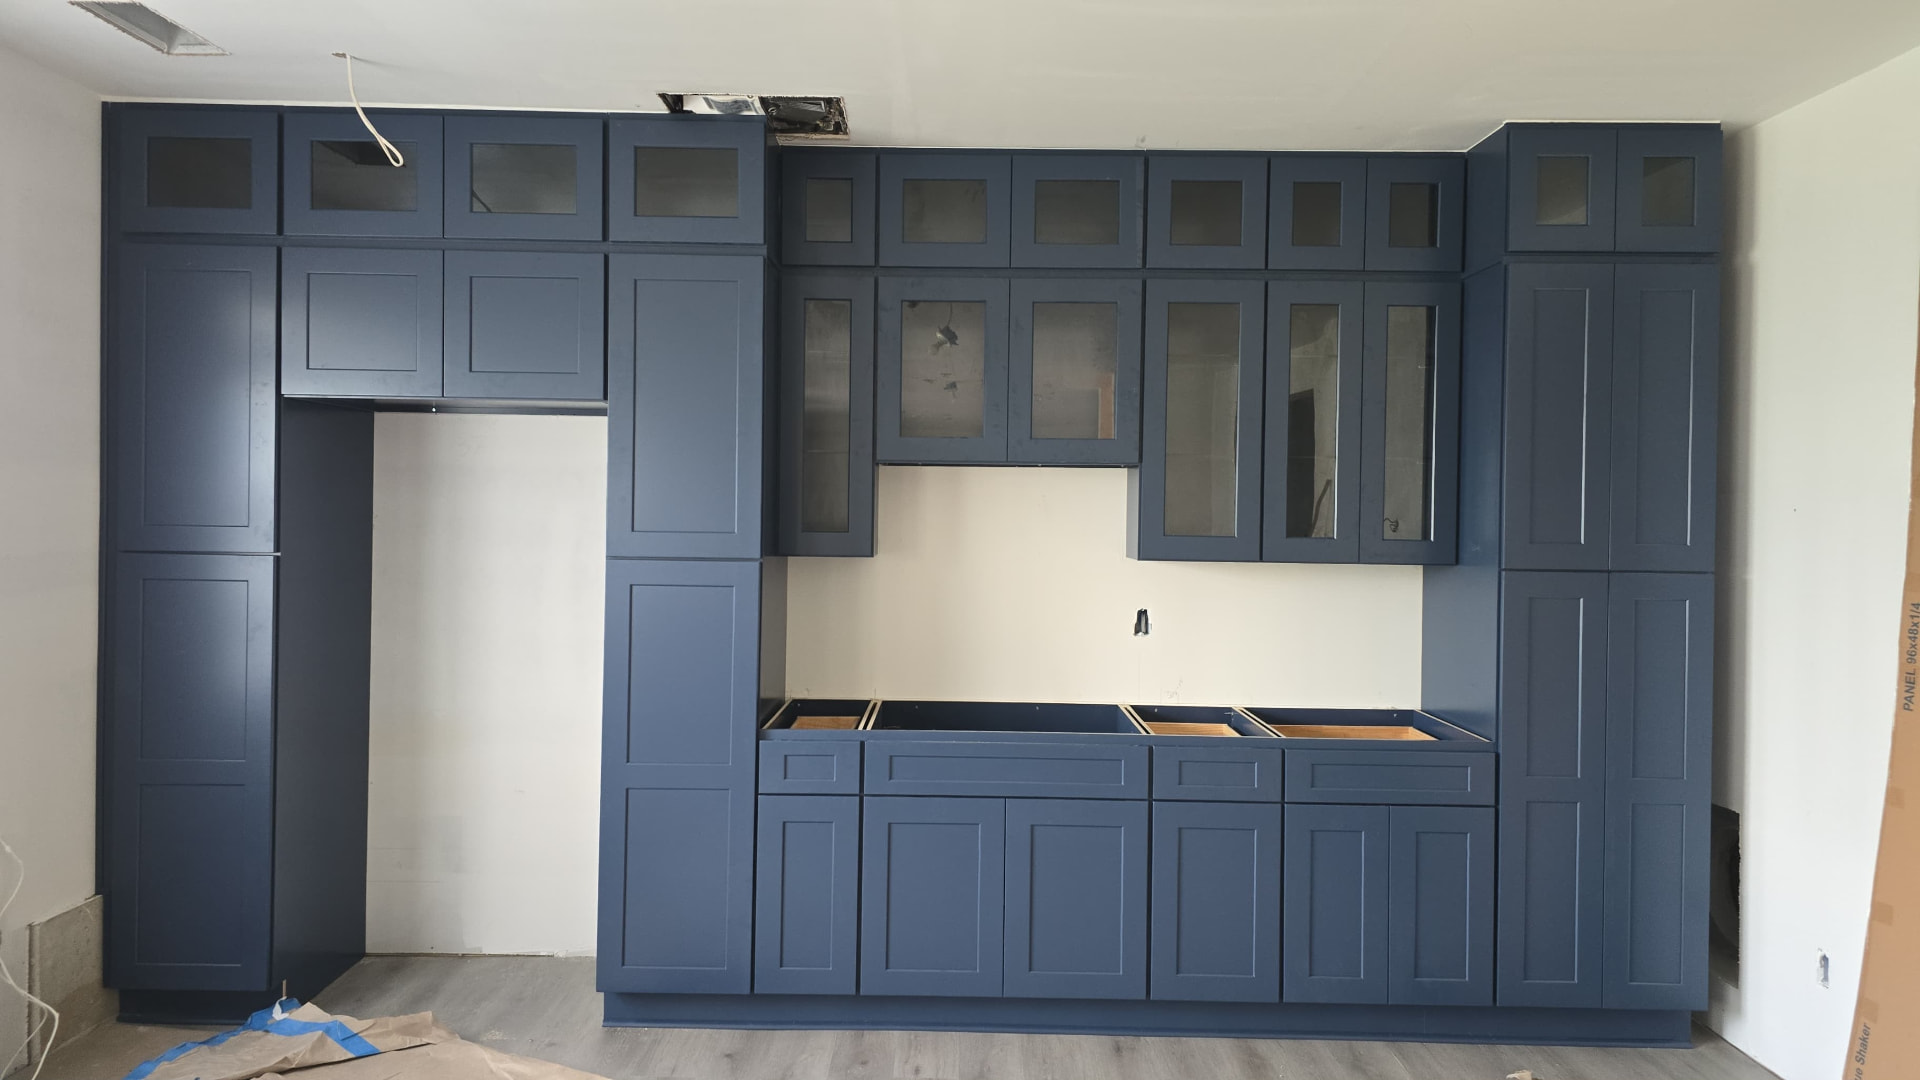
The homeowners wanted colour, storage and symmetry. The room had one long, uninterrupted wall and a doorway at the left that had to stay usable. Instead of treating the doorway as an obstacle, we wrapped it: tall cabinets on both sides, a bridge of cabinets above it, and the whole assembly carried up to the ceiling so the opening reads as a designed niche rather than a gap in the cabinets.
- Navy blue shaker doors and drawer fronts on every box, including the tall units.
- Two rows of uppers — working-height glass doors below, stacked glass cabinets above — taken to the ceiling.
- A recessed hood area centred on the run, with glass cabinets stepping down on both sides of it.
- Tall pantry towers at each end so the run is symmetrical from across the room.
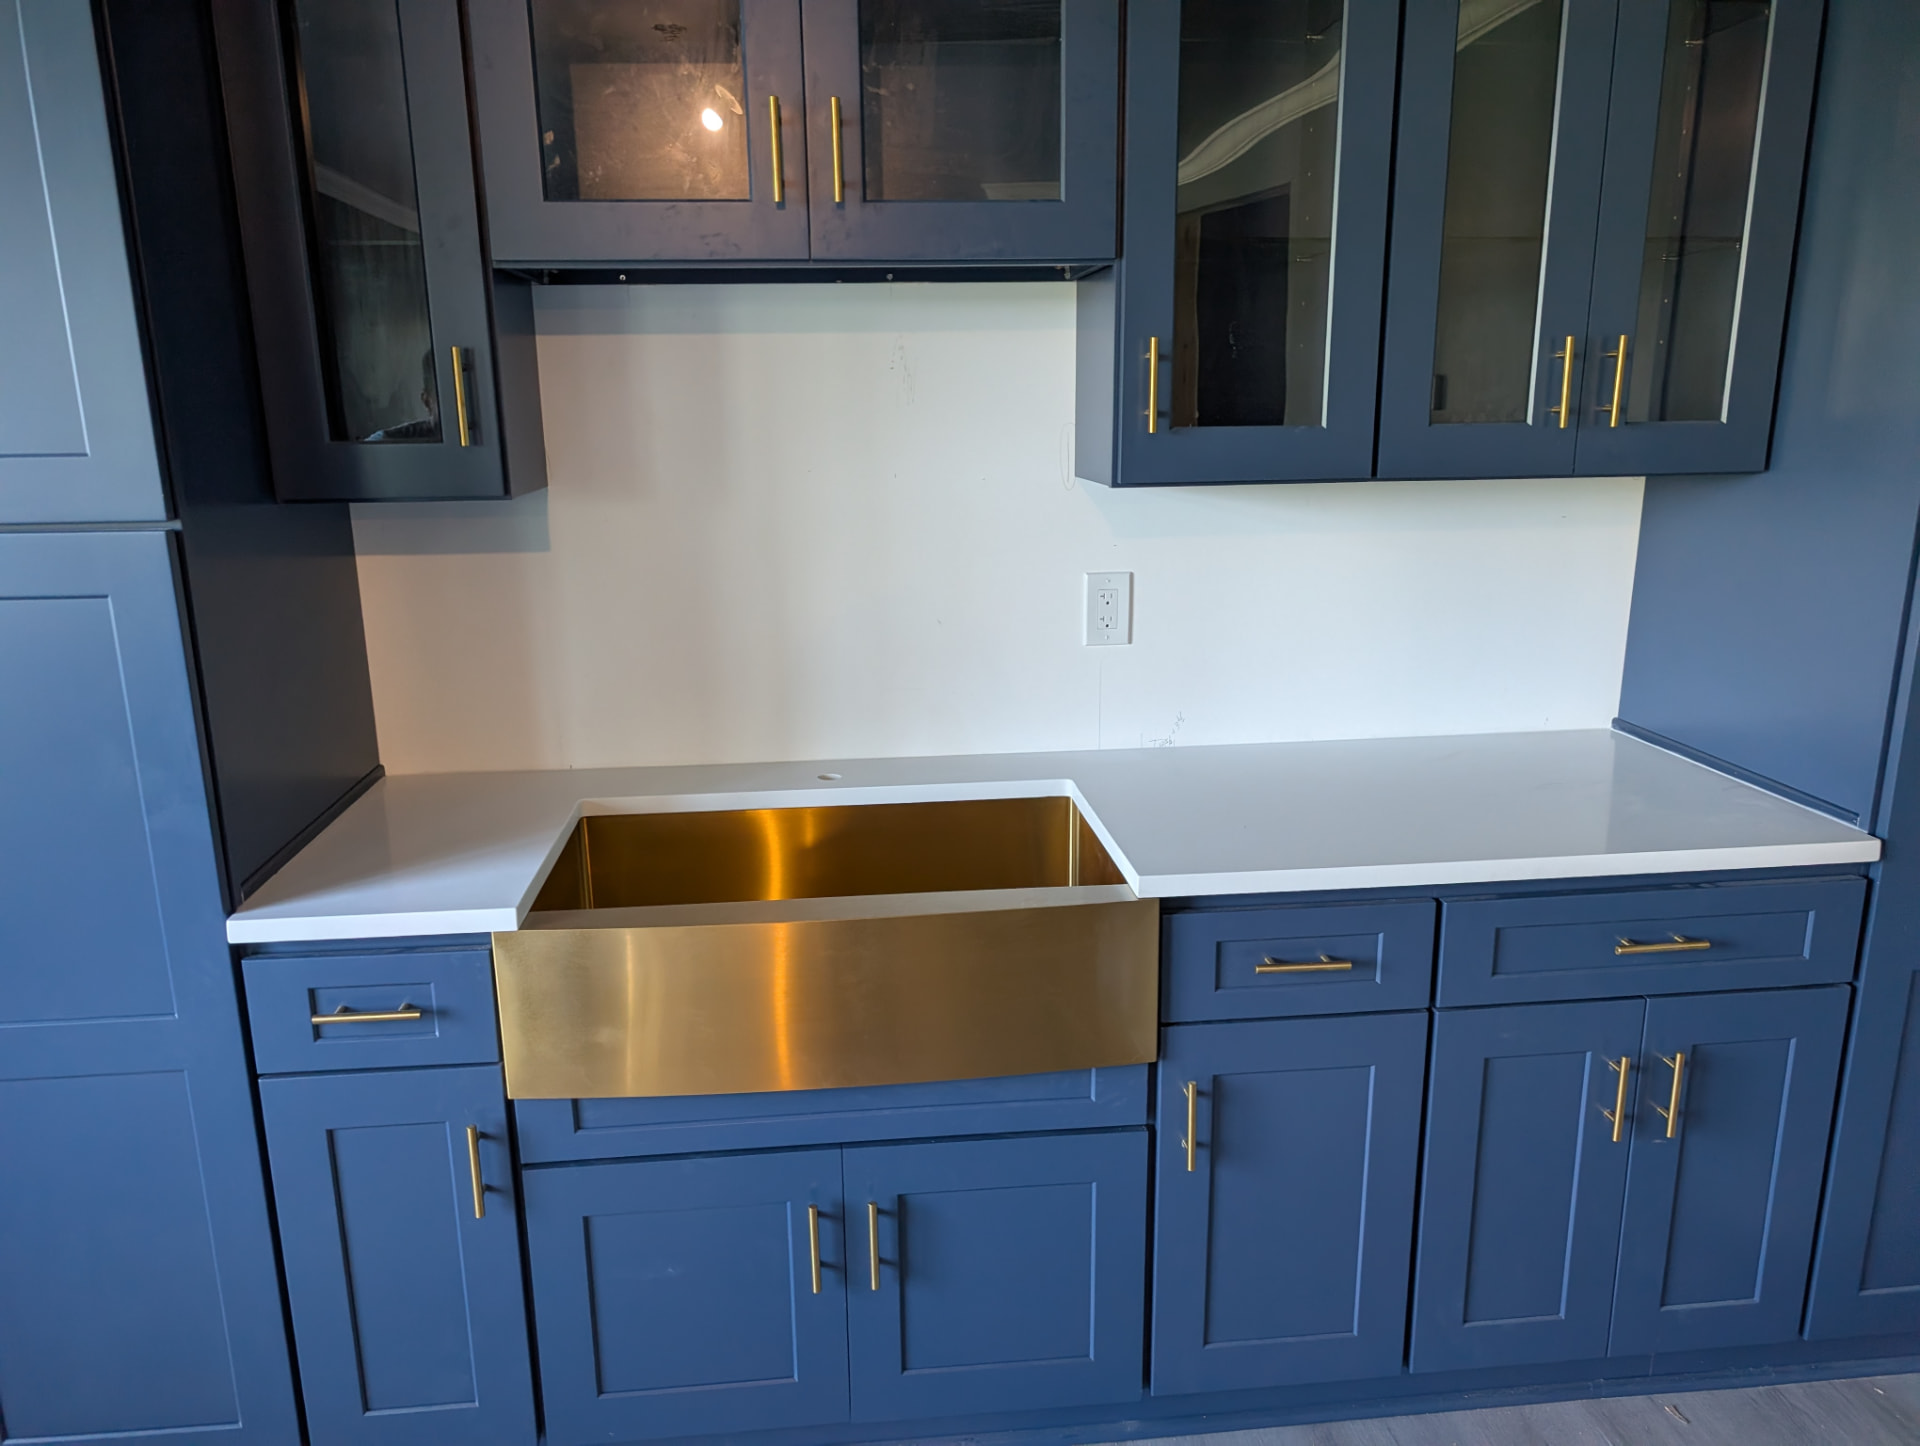
- White quartz counters, a brass farmhouse sink and brushed gold hardware against the blue.
Laying out a wall like this
A full wall of cabinets has no forgiving end. On a normal run you can hide a small discrepancy in a filler at the corner; here, both ends are visible and the doorway in the middle sets a fixed reference point. So the layout starts from two places at once and has to meet cleanly.
We drew the wall to the actual measured opening and adjusted cabinet widths rather than stretching fillers, then dry-set the tall units to confirm the doorway trim would clear. The bridge over the doorway had to land at the same height as the tops of the flanking towers, so that dimension drove the rest of the elevation.
The ceiling was the second constraint. Stacked uppers only look right if their top edge follows a straight line, and ceilings almost never do. We ran the top row to a level line and closed the small varying gap with scribe trim rather than letting the cabinets follow the ceiling and wander.
Glass doors change the tolerances
Glass fronts show everything. The inside of each cabinet is now finished surface, hinges and shelf pins are visible, and any twist in a door reads immediately as an uneven reveal against the frame. Every door on this wall was adjusted at the hinge in all three axes after the boxes were set, then checked as a row rather than one at a time.
Hardware set with a jig, not a tape measure
On a wall with this many doors, handle placement is the detail people notice without knowing why. Every pull was drilled off a jig so the vertical pulls sit the same distance from the door edge and the drawer pulls all centre at the same height. Brushed gold against navy is a high-contrast combination — a quarter inch out on one handle is visible from the doorway.
Counters and the brass sink
The counter run was templated after the bases were set and levelled, not before. White quartz was chosen to break the wall visually and to keep the room from going dark, and the brass apron-front sink sits proud of the cabinet face as the single focal point of the run.
An apron sink needs its cabinet modified: the front of the sink base is cut down to the sink height and reinforced underneath so the basin carries its weight on the cabinet and not on the counter. We set the sink and confirmed the reveal on both sides before the quartz went down, because there is no adjusting that gap afterwards.
Problems we hit
A ceiling vent in the middle of the run
A supply vent sat directly above where the tall cabinets landed. Rather than shortening the towers, the vent was relocated a few inches before the cabinets went up, which kept the elevation symmetrical.
Stacked cabinets and hidden fastening
The upper row had to be fastened to the lower row and to blocking in the wall, without visible screws inside a glass cabinet. That means blocking goes in before drywall repair, and fasteners are placed where a shelf or a finished panel will cover them.
Colour consistency across batches
Painted doors from different production runs can shift very slightly. On a wall this size we laid every door out before hanging and grouped them so any variation runs vertically rather than sitting side by side at eye level.
The result
The finished wall is one continuous piece of cabinetry from floor to ceiling with a working kitchen inside it: pantry towers at both ends, deep drawers under the counter, display glass above, and a hood niche centred on the room. The white quartz and brass keep the navy from feeling heavy, and the doorway is now framed by the cabinetry instead of interrupting it.
What we would tell the next homeowner considering a dark colour
Dark cabinets need light counters and warm metal, and they need light in the room — this kitchen has a large opening opposite the run. If your kitchen is closed in, take the colour on a lower run and keep the uppers light. And if you want glass doors, decide early: it changes the interior finish of the cabinets and what you can store in them.
Do cabinets have to go all the way to the ceiling?
No, but taking them up removes the dust ledge, adds a full row of storage and makes the room feel taller. On this Suwanee kitchen the top row is stacked glass, so it is display storage rather than daily storage.
Are glass-front cabinets harder to install?
They are less forgiving. The cabinet interiors are visible, so shelves, hinges and fastening all have to be planned, and every door reveal has to be adjusted as part of a row rather than on its own.
Can a farmhouse sink go into standard cabinets?
The sink base has to be modified — the front is cut to the apron height and the basin is supported from below. It is a normal part of the install, but it needs to be planned before the counters are templated.
Will a navy kitchen date quickly?
Painted cabinetry can be refinished, and the layout is the part you live with. We build the boxes and the layout to last; the colour is the easiest thing on the wall to change later.